Chinese Chive Pockets (韭菜盒子)
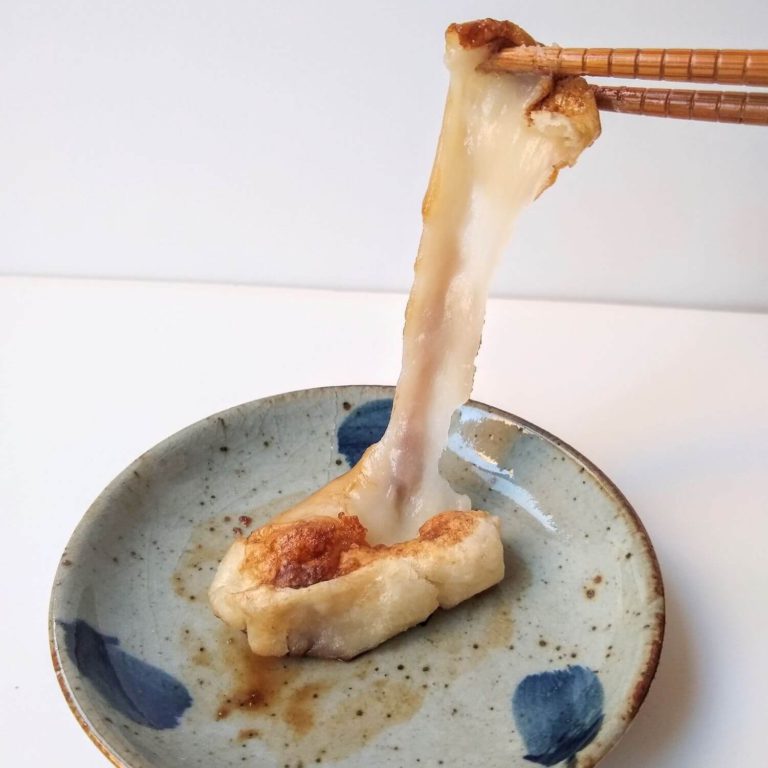
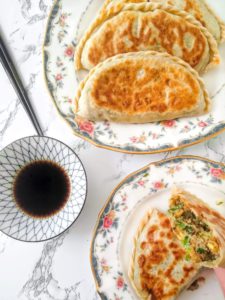
Chinese chive pockets are a deliciously light version of traditional dumplings. This recipe yields pockets with a thin skin and a generous amount of savory filling that crisps up nicely when pan-fried.
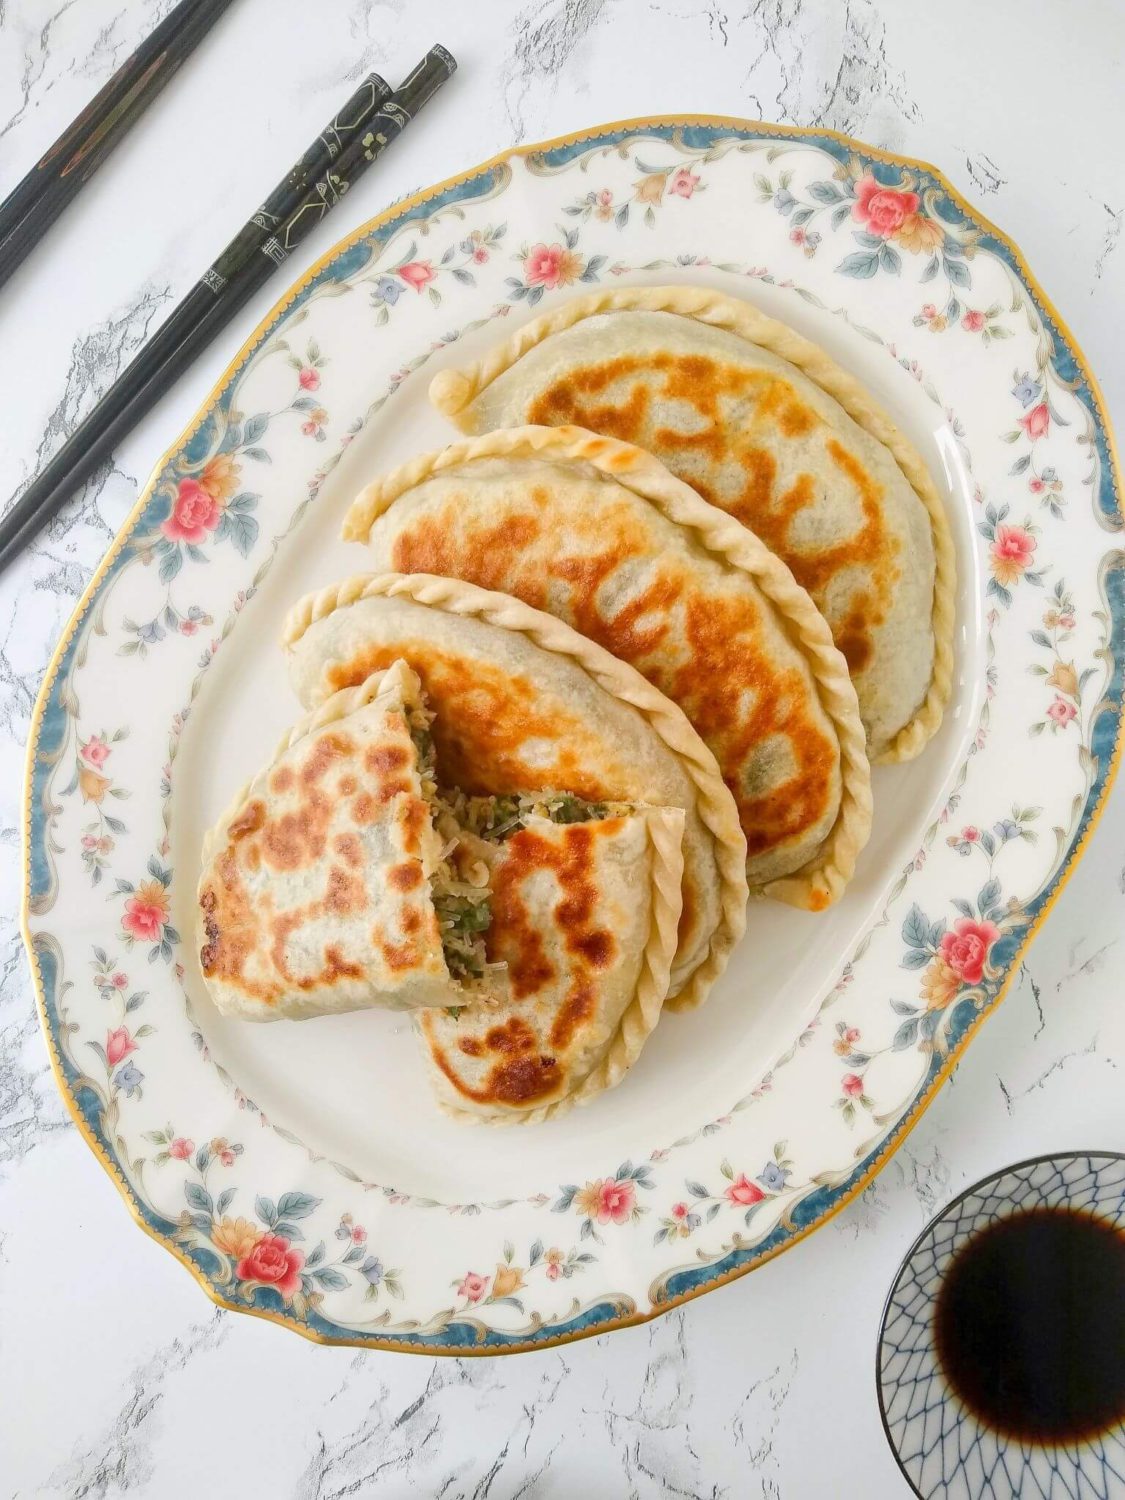
Chinese chive pockets (韭菜 盒子, Jiu Cai He Zi) are a common dim sum dish and street food. The difference between chive pockets and dumplings is that chive pockets are much larger, have a thinner wrapper, and have more filling. This change results in a lighter dish that works both as an appetizer and a main course.
The most common ingredients for chive pockets are Chinese chives, mung bean vermicelli, and eggs. My recipe adds dried shiitake mushrooms and dried shrimp for extra umami flavor. I also make my pockets with thinner skin than other recipes, so this recipe is low-carb!
Tips/Tricks:
- Hot water in the dough helps to make the wrapper more chewy and easy to roll out.
- Make sure that you are using garlic chives, which is a key ingredient for this dish. Garlic chives/ Chinese chives are flatter and taste more garlicky than the western variety.
- Roll out the dough thinly but not to the point where the dough starts to become see-through. If you roll out the dough too thinly, it becomes prone to breaking when you pan-fry it.

Chinese Chive Pockets (韭菜盒子)
Ingredients
Dough
- 160 mL hot water (2/3 cups)
- 240 g all purpose flour (2 cups)
- 1 tsp vegetable oil
Filling
- 225 g Chinese chives (1/2 lb, also known as garlic chives)
- 2 tbsp dried shrimp (20 g)
- 4 dried shiitake mushrooms (20 g)
- 3 eggs
- 50 g mung bean vermicelli (fen si, 粉絲)
Seasoning
- 1 tbsp ginger minced
- 1 tsp salt
- 1 tsp sugar
- 1/2 tsp white pepper
- 1 tsp five spice
- 1 tbsp sesame oil
Instructions
- Rehydrate the shiitake mushroom and dried shrimp with hot water.
Make the Dough
- Add the flour into a large bowl. Add the flour into a large bowl. Pour the hot water and oil into the bowl and mix to combine.
- Cover the bowl and let the dough rest for 30 minutes while you prepare the filling.
Prepare the Filling
- Cook the vermicelli noodles according to the packaging instructions.
- Drain the mushrooms and shrimp, reserving the water. Chop mushroom, shrimp, and chives finely.
- Whisk the eggs and scramble them in a nonstick pan over medium heat. Set aside.
- Drizzle more oil into the skillet and sauté the mushroom and shrimp until lightly browned and fragrant. Let cool.
- Mix the filling ingredients, seasoning ingredients, and reserved mushroom/shrimp water together in a large bowl. Taste and adjust the seasoning to your liking.
Assemble
- Flour your work surface. Divide the dough into eight pieces. Roll out the dough thinly into a large circle, around 7" in diameter. Note 1
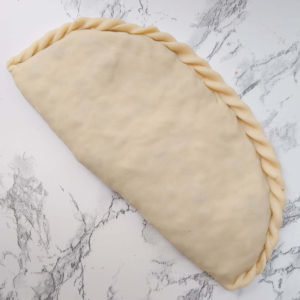
- Place a generous 1/3 cup of filling into the center. Fold the dough in half and press out any extra air. Seal the pocket to form a half-moon shape. Optionally use your thumb to pinch small pleats along the outer edge. (See post above for more details on pleating)
- Repeat with the remaining dough and filling.
Pan-Fry the Pockets
- Heat some oil in a pan over medium heat. Add the pockets in and cover the pan with a lid.
- Pan fry the pockets for a few minutes on each side until golden brown. Halfway through pan-frying, add a splash of water.
Storing
- Place the pockets spaced apart on a lined baking sheet and freeze until completely hardened. Transfer the pockets to a freezer-safe bag with parchment paper between each pocket to prevent them from sticking to each other.
- Cook the pockets without thawing beforehand. Cooking frozen chive pockets will take a few more minutes than fresh pockets.
Notes
- When rolling out the dough, stop rolling before the dough begins to turn translucent. Otherwise, the dough is more likely to break when pan-frying.
How to Make Chinese Chive Pockets
Begin by rehydrating the shiitake mushroom and dried shrimp with hot water.
Make the Dough
Add the flour, hot water, and oil to a bowl. Knead for several minutes until the dough turns into a smooth ball. Cover, and let it rest for 30 minutes while you prepare the filling.
Prepare the Filling
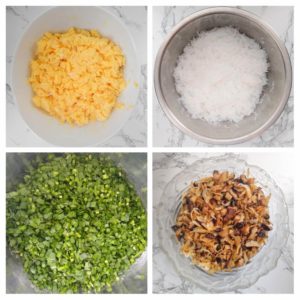
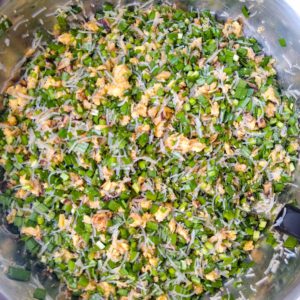
Cook the vermicelli noodles. Then, drain the mushrooms and shrimp, reserving the water. Chop the mushroom, shrimp, and chives. Scramble the eggs, sauté the mushroom and shrimp, and let them cool. Finally, mix the filling ingredients, seasoning ingredients, and reserved water.
Assemble the Pockets.
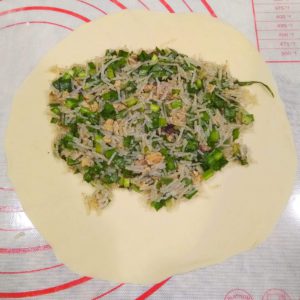
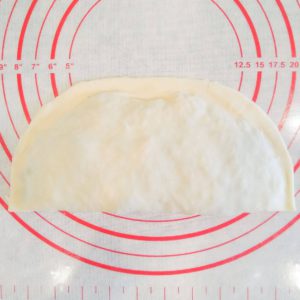
Flour your work surface. Divide the dough into eight pieces. Roll out one dough piece and place filling in the center. Fold the dough over, press out any extra air, and pinch to seal.
**To create a pleated edge:
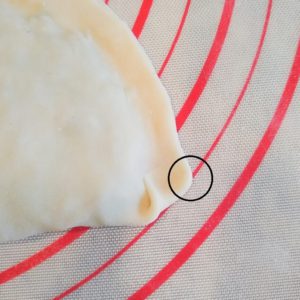
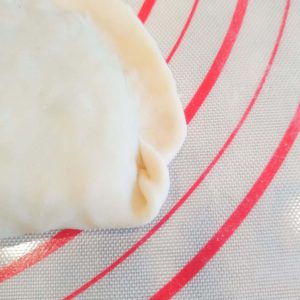
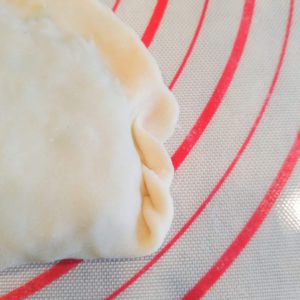
Fold the bottom corner diagonally towards the middle of the pocket and pinch. A new triangular corner should form right where you pinched (circled in the picture above). Then, take that new corner and similarly fold it over. Repeat until the entire outer edge of the pocket is pleated.
If this is too difficult or confusing, you either leave the outer edge of the pocket as is, or you can press the tines of a fork along the edge to create a simple pattern.
Assemble the remaining dough and filling.
Pan-Fry the Chive Pockets
Cover and pan-fry the pockets over medium heat on each side until golden brown. Add a splash of water halfway through to help the pleated edge to cook through.
Storing
Place the pockets spaced apart on a lined baking sheet and freeze until completely hardened. Transfer the pockets to a freezer-safe bag with parchment paper in between to prevent them from sticking.